claude code permission 설정하고 mcp Tools 설정하기
목차
Claude code 를 처음에는 Pro로 사용하다가, 그다음에 Max x5 사용하다가, 결국에는 Max x20 을 사용하게 됬다. 그래서 개발에 잘 사용하고 있는데, 엔터 눌러주기도 귀찮아지는 상황이 발생하기도 하는데, 이때 permission 을 설정해주면 된다고 한다.
Permission 설정하기#
cat ~/.claude/settings.json
code ~/.claude/settings.json
{
"permissions": {
"allow": [
"Bash(rg:*)",
"Bash(ls:*)",
"Bash(find:*)",
"Bash(grep:*)",
"Bash(sed:*)",
"Bash(pnpm run lint)",
"Bash(pnpm run format:*)",
"Bash(pnpm run types:*)",
"Bash(php artisan:*)",
"mcp__context7",
"mcp__playwright",
"mcp__serena"
],
"deny": [
"Bash(curl:*)”
]
},
"model": "opus"
}permissions.allow 와 permissions.deny 에 해당 명령어를 자동으로 허용하게 해주면 좋다. (보안상 위험 없는 커맨드들만 설정)
mcpSever 설정#
mcp tools 을 사용하기 위해서, mcpServer를 연결해주면 된다.
cat ~/.claude.json
code ~/.claude.json
이곳에 클로드 관련된 데이터들이 모두 다 존재한다. mcpServer 는 각 프로젝트 별로 설정할 수 있지만, 글로벌하게 설정하는 방법이 있다.
  "lastReleaseNotesSeen": "1.0.29",
  "mcpServers": {
    "context7": {
      "type": "sse",
      "url": "https://mcp.context7.com/sse"
    },
    "taskmaster-ai": {
      "type": "stdio",
      "command": "npx",
      "args": [
        "-y",
        "--package=task-master-ai",
        "task-master-ai"
      ]
    },
	"playwright": {
	  "type": "stdio",
      "command": "npx",
      "args": [
        "@playwright/mcp@latest"
      ]
    },
    "sequential-thinking": {
	  "type": "stdio",
      "command": "npx",
      "args": [
        "-y",
        "@modelcontextprotocol/server-sequential-thinking"
      ]
    },
  },
lastReleaseNotesSeen 바로 아래에 이렇게 mcpServer 를 넣어주면 된다.
- context7: (라이브러리 패키지 최신 문서) https://github.com/upstash/context7
- taskmaster-ai: https://github.com/eyaltoledano/claude-task-master
- playwright: (브라우저 실행) https://github.com/microsoft/playwright-mcp
- sequential-thinking: (더 생각하기) https://github.com/modelcontextprotocol/servers/tree/main/src/sequentialthinking
나는 현재 이렇게 사용하고 있다. mcpServer 리스트는 계속해서 유용한건 추가하고, 필요 없는건 삭제하면 좋을 것 같다.
그리고 추가로 사용해보려고 하는 것이, https://github.com/oraios/serena 이라고 있다.
이것은 프로젝트 별로 설정이 필요한 것 같다. (프로젝트 내용을 파악하고 메모리 기능이 있어서 그런가 봄)
클로드를 사용할 프로젝트 폴더에서
claude mcp add serena -- uvx --from git+https://github.com/oraios/serena serena-mcp-server --context ide-assistant --project $(pwd)위 명령어를 입력해주면 된다.
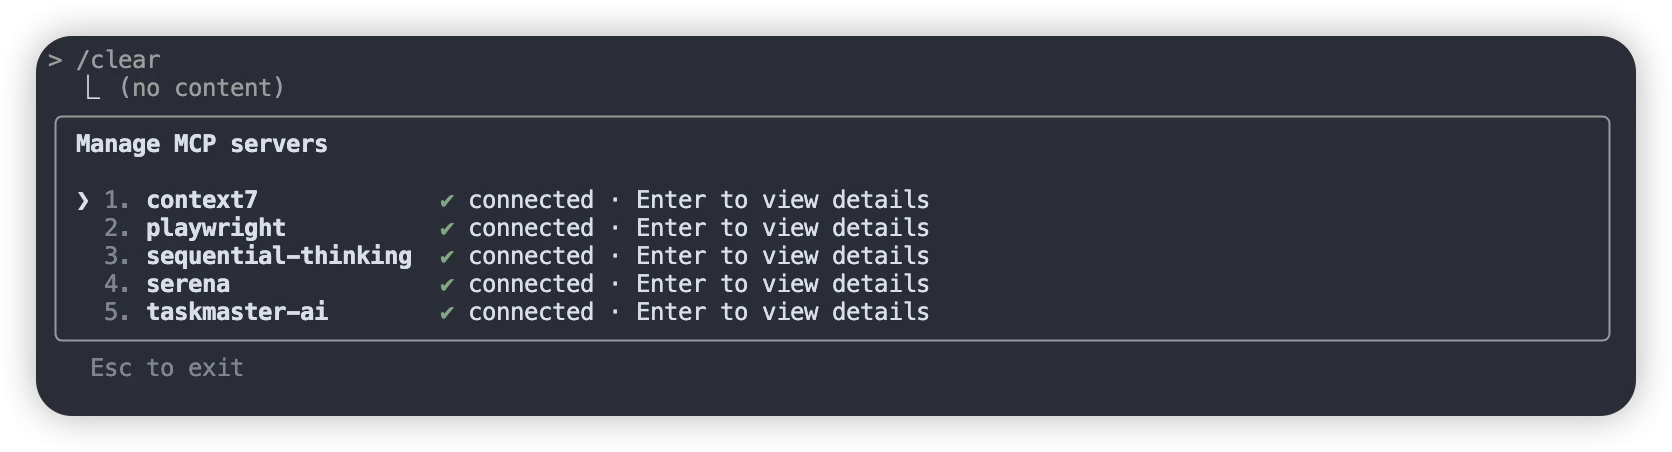 그 다음에 Claude 에서
 /mcp 명령어 입력할 경우, 이렇게 연결된 mcp 서버들이 출력 되고, LLM 사용하다보면 툴을 알아서 사용하게 된다.
글로벌 Claude.md 규칙 수정하기#
code ~/.claude/CLAUDE.md해당 파일을 수정하면 된다. (글로벌 파일임)